Thursday, August 30, 2012

SDCC 2012 Shockwave and MARS Warehouse Meeting

I'm not usually one for reviews of official product, so bear with me. Also, most respectable sites out there reviewed this piece over a month ago, when it was released. Oops.


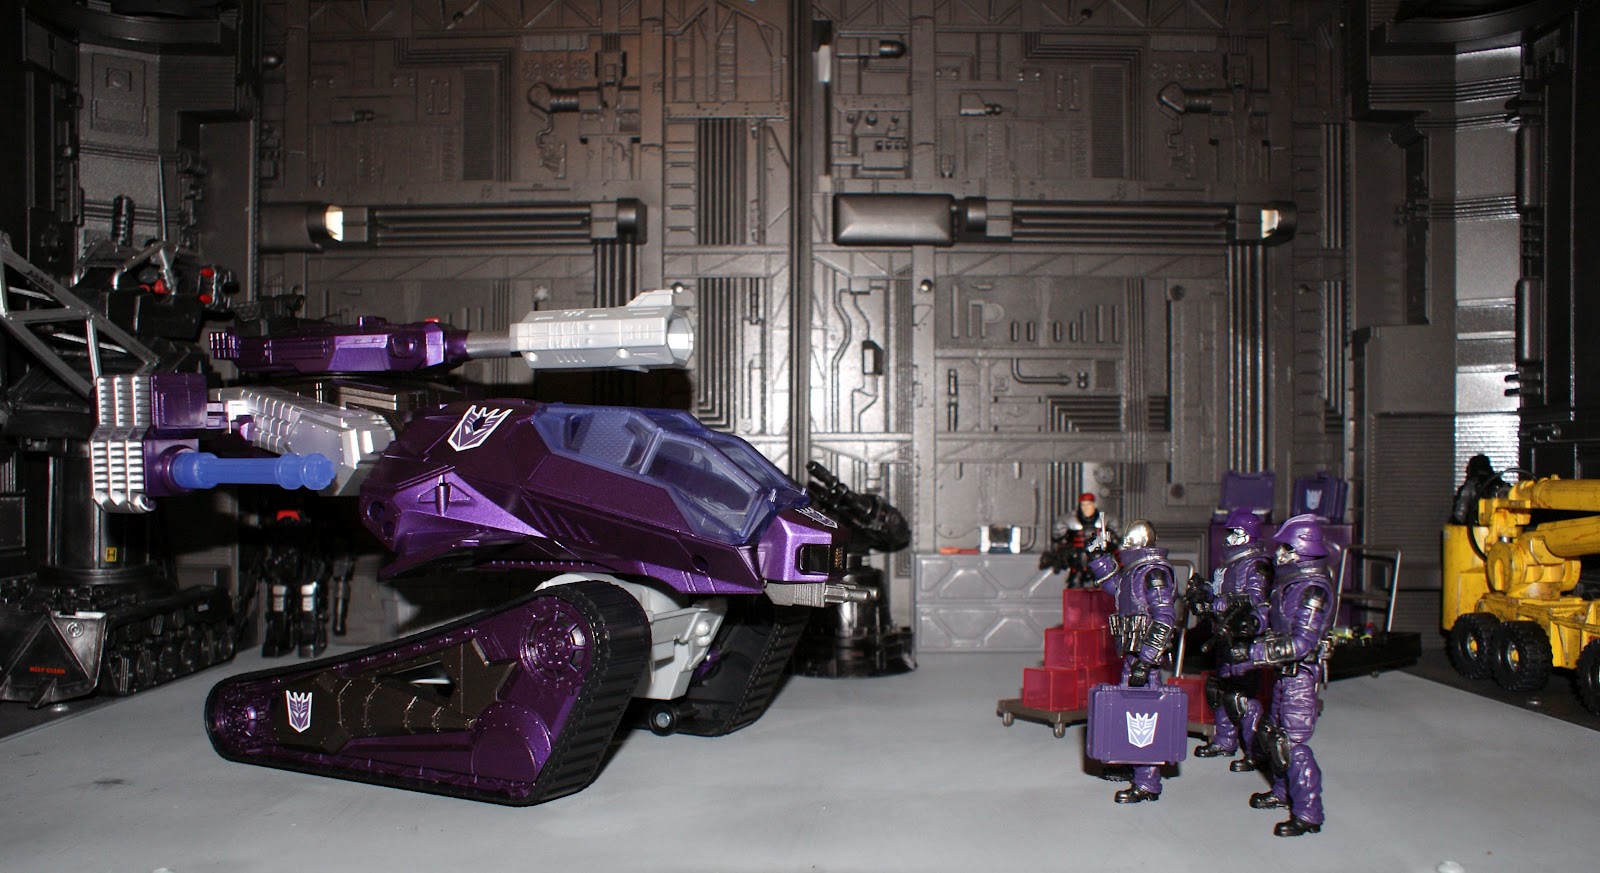
At the 2012 San Diego Comic Con, among the already nerd-erecting assortment of exclusive products offered, Hasbro released the GI Joe-Transformers crossover "Shockwave" HISS Tank. Using the most recent incarnation of the HISS from the delayed Retaliation movie, and repainting it in the striking metallic purple and gray color scheme of the classic Decepticon character, Shockwave, this set continues the series started with the SDCC 2011 Skystiker Starscream.

As well received as Starscream was, this Shockwave set tops it in many ways. Where repainting Starscream as a Skystriker was almost obvious to many fans, the more subtle combination of Shockwave and a HISS tank caught many by surprise. The Retaliation HISS has a very modern, almost futuristic design, that is easily lost on the retail movie release. But, once they add a new turret cannon, give it a sharp metallic paint job and adorn it with Decepticon symbols, it plays the part of a Transformer very well.


Also included were a pair of figures, Destro in a beautiful Decepticon allied purple deco, and a Constructicon BAT, a Battle Android Trooper in a classic Constructicon deco, another stroke of brilliance that no one saw coming.

On top of some pretty cool figures, the set has some of the greatest accessories of any recent GI Joe release. Soundwave makes an appearance in his classic tape deck form, complete with removable cassettes, and scaled down to GI Joe size. It is a beautifully sculpted piece, and has a backpack peg to allow it to be carried around by Destro. Possibly one of the coolest accessories of recent years, the suitcase full of money from the Pursuit of Cobra City Stike Destro is reused here as well. Rounding out the list is a repainting of the flatbed dolly and Mass device elements from the 2008 DVD pack, this time used in a clear pink and white to simulate "Energon", the life sustaining substance that the Transformers frequently fight over.


As I mentioned, the HISS itself is absolutely gorgeous. The metallic purple, gray and black color scheme changes the entire feel of the tank, bringing out details that the retail release leaves a bit flat. The new turret cannon, modeled after a vintage Shockwave gun barrel, is well done and brings the look together very well.


Hasbro absolutely outdid themselves with this set. It goes way beyond the Starscream Skystriker in terms of deco design and execution, and sets up an interesting "partnership" in Shockwave and Destro, both of whom tend to play second to their leaders, Megatron and Cobra Commander, both are known to be pragmatic and ruthless, and both would have no problem assuming command in the event of their leader's demise.

The set sold for $59.99 at Comic Con, and there were reports that it sold out by the second day or so. Much like the Starscream, the pre-orders (read: people going to the show that plan to stand in line and get one, but will sell it to you now and deliver later) for this set from eBay sellers topped $200 before it was available, but last I checked, they had leveled off to the $140 mark, give or take, once all the Hasbrotoyshop.com orders had been shipped (it was briefly available there for people who didn't attend the show). A lot of sellers are splitting the set up as well. The Constructicon BAT seems to be the highest ticket item, which I have seen sell for $50 to $80. Destro with some accessories can be found for $25-$40, and the lot of Soundwave and his tapes fetches around $20-$25. Those prices could easily fall with time.

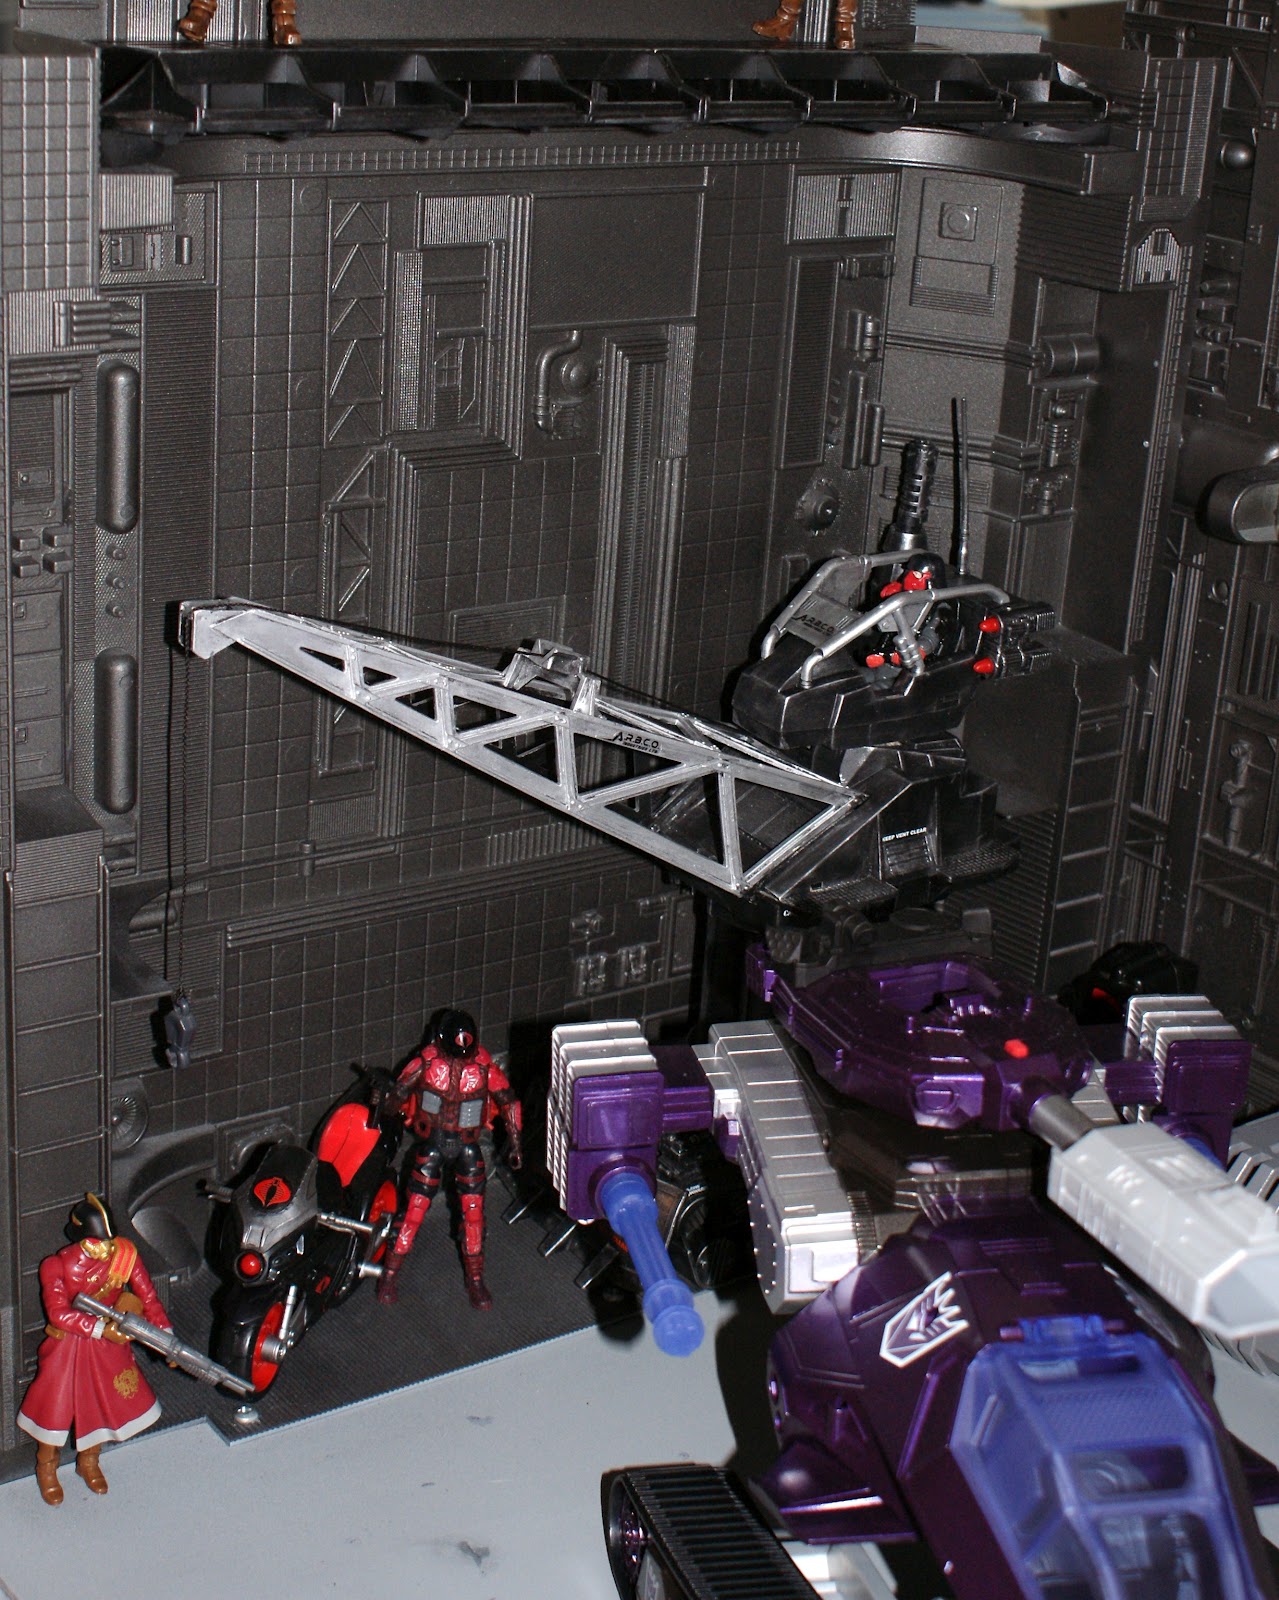
When I finally got my hands on one, I was inspired to do a simple dio scene of the meeting of Destro and Shockwave, which is depicted on the back of the box in the form of a stylized comic page. I have been wanting to do a "high tech warehouse" looking backdrop for a while, something large that I could photograph custom vehicles against. I call this a "MARS Warehouse" and while the initial idea was a simple one, it quickly expanded to include additional figures (I was able to find a couple extra Destros, which I added Iron grenadier heads to for "Decepti-Grenadiers"), background elements like the crane and cherry picker, as well as some cargo boxes and MARS weapons. I'll go into more detail on some of the background elements in a later post.

The Robot Heroes Shockwave was provided by my 2 year old daughter, Fiona. She keeps saying "This is my Shockwave, that is Daddy's Shockwave."


Tuesday, July 31, 2012

GOING B.A.T.-TTTTTYYYYYYYYYYYY!!!!!

Let me preface this by saying there are few things that really excite me when it comes to GI Joe. I mean, I'll look forward to a figure or vehicle release, or a show or convention, and sometimes getting a nice new piece of art or a prototype for my collection certainly gets the blood pumping, but in truth, I have seen a lot. I've read a lot. I know fair amount. Certainly not everything, I wouldn't profess that, and I am always eager to learn, but in truth, after 30+ years of buying Joes, I am a little jaded. Plus, my attention span isn't what it used to be. I get bored easily. And distracted even more easily....

Sorry, TV was talking....

All that said, these are AWESOME.

They are BATs, Cobra's Battle Android Troopers. The original Cobra BAT was released in 1986 in the classic yellow and black color scheme, and had several remakes over the last 27 years, but the original mold was never revisited in its entirety. Until now.

I should mention, these are not made by Hasbro. They are made by a "third party", a catch all term that has been used often in the last few years to categorize items made for use with GI Joe, like accessories or upgraded parts, and sometimes for bootlegs and knockoffs, that are not authorized by Hasbro. It is mostly used for the Transformers line, but applies to GI Joe for custom cast parts, figures, and these. Since they are not endorsed by Hasbro, and Hasbro doesn't make any money from the use of their trademarks...they are...kind of...basically...not...legal.  


BUT they are awesome, legality be damned.


And who IS this evil...Person? Or persons? Or....Company? They who would defy, infringe on trademarks and laugh in the face of a multimillion dollar company like the great big H? Some Asian super factory pumping out midnight bootlegs in mass quantity? A global criminal organization bent on world domination?  I don't know. Seriously, I don't know. I've never met them. So if you want some, you need to find them yourselves. (Hint: Check eBay.) 

Overall, the quality is great. Paint applications and deco selection are top notch, using a little seen BAT logo as an optional chest decal (dubbed a HUB chest symbol) as well as replacing the classic Cobra sleeve emblem. The chest logos are not lenticular, like the vintage BAT, but the original chest image is reproduced well in a flat image. The construction is quite good for a third party project, there are some issues with a few loose joints here and there, and the backpacks are a bit brittle, but given the scope of the project, arm attachments, etc, I think a few small flaws are easily forgiven. But, I wouldn't give one to your 5 year old nephew to chew on.

Regardless, the figures are AWESOME (did I say that twice already?). BATs in different colors to reflect a troop affiliation or environmental conditions? Again, AWESOME. The same manufacturer has done several other figures, including the classic Cobra Infantry Trooper and Crimson Guard, and given them a similar treatment for environmental and troop colors, so for someone who has been following and picking up these items for a while, they make for a nice display.

The following pics are from my collection, and feature a mixture of custom figures and vehicles with standard Hasbro figures.

Green for a jungle or forest environment.


Red/Orange, which I think were originally intended to be Crimson Guard oriented BATs, but they are more orange in color. They are darker than the classic Alley Viper, but could probably be used with them. Personally, I have had a major hard-on for the Hazard Vipers, and the whole Compound Z storyline, so I put them in my Z-Lab dio.


White for, obviously, arctic battles.


Black and silver for....Well, nothing in particular, but they look pretty cool...


A sandy yellow-tan for desert operations.


A classic Cobra Blue to match the standard Infantry troopers.


And finally, a reproduction of the original black and yellow BAT from 1986. I have posted photos of him next to a regular vintage BAT to illustrate the differences, in the event some buyers might be intimidated by the prospect of someone passing off the modern reproductions as vintage originals.

The reproduction is on the left, the original is on the right, in every picture.

At a glance, you can see that the chest is not painted silver behind the chest emblem. Also, the different arm symbol, reflecting the BAT logo, is used on the sleeve.


The lenticular chest emblem is obviously different from the flat repro decal image.


On the backs, the hole to attach the backpack is much larger, as is the corresponding peg on the backpack. Also, there is no "Made in Hong Kong" stamp on the rear end.


And finally, and possibly most importantly, the attachment point for the arms is wider on the reproduction, so the repro accessories can not be passed off as vintage because they just won't fit.


I can't tell you how happy I was tearing into these figures. I have been hoping the manufacturer would tackle this figure, and the wait was well worth it. Some minor flaws aside, I think any vintage army builder would love these, so if the chance to grab them comes along, do it. They won't last long.


Friday, July 20, 2012

Custom Cobra Sand Dragon- Work in Progress to Finished Piece

 Often, friends and other collectors ask me how I made something, what supplies I use, or how I painted one of my customs, and while I'm always happy to share tips and techniques, it isn't always easy to explain. I thought it would be fun to follow my progress on a custom and document it here.

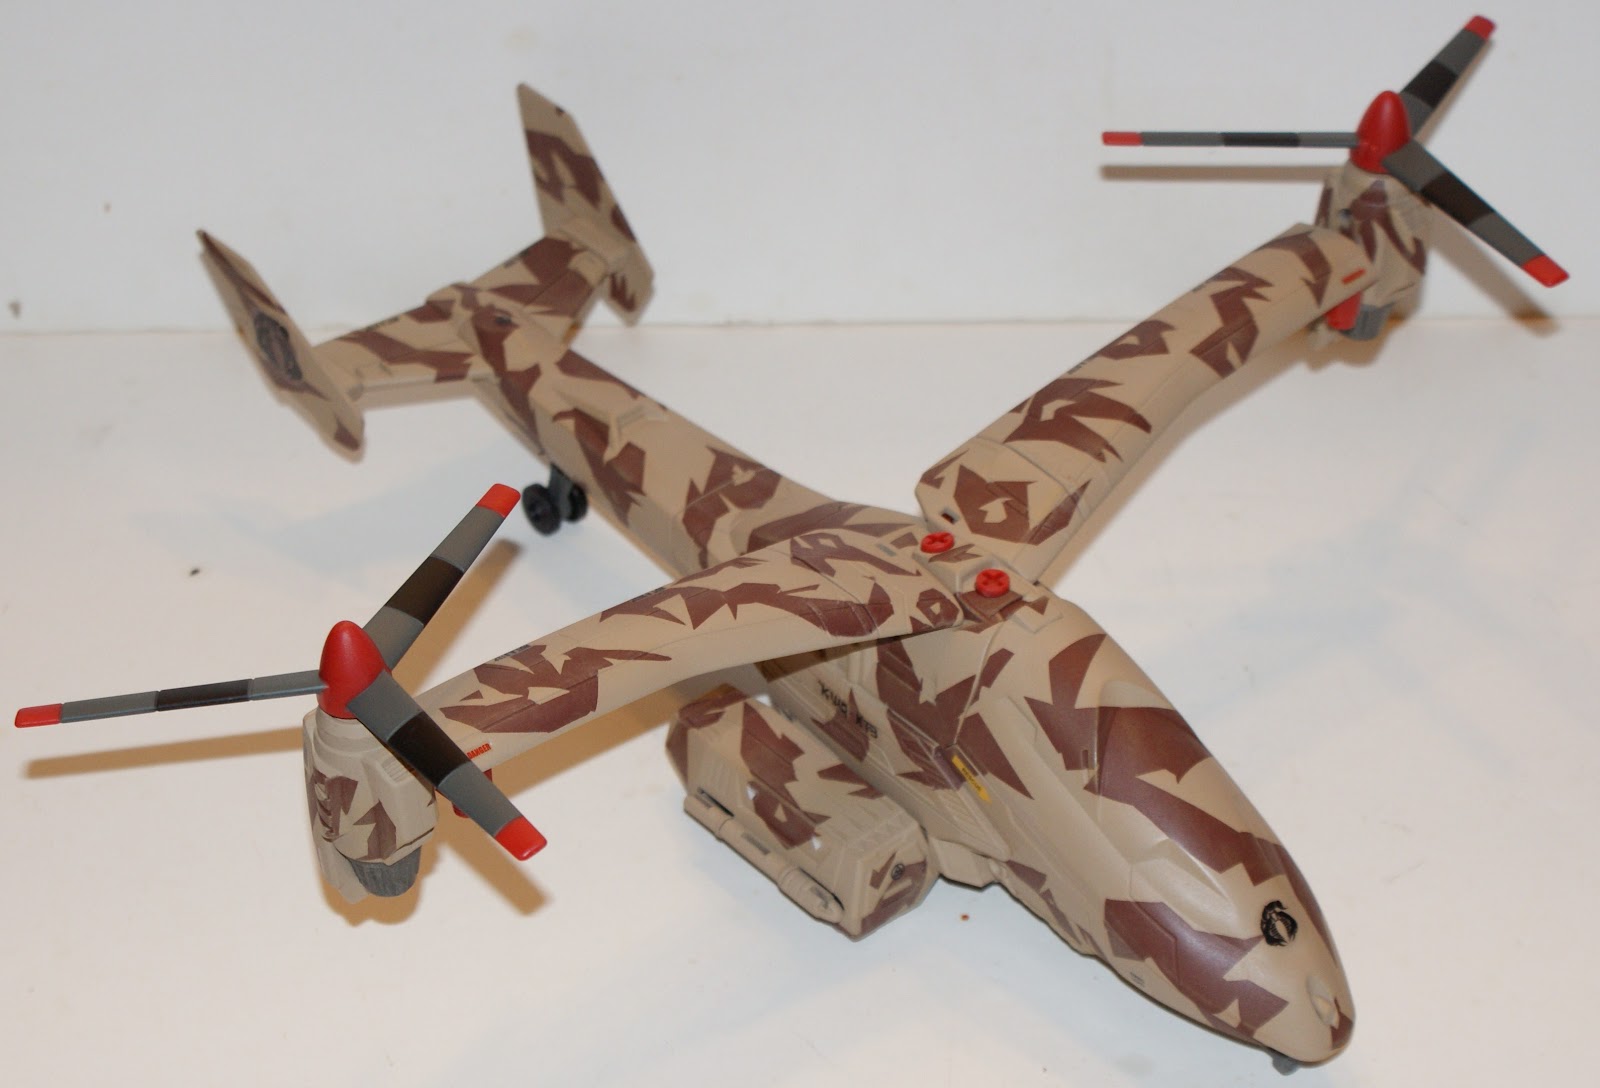
This post will be a full progress "how-to" style article about my most recent custom, the Cobra Sand Dragon, a simple desert themed repaint of the Cobra Black Dragon.


The Cobra Black Dragon is a "GI Joe: Renegades" animation based toy that was released in 2011 as part of the 30th anniversary line of 33/4" GI Joe products. In the cartoon, it was a large, high tech Osprey type aircraft, with seating for multiple people. The toy translation left a lot to be desired in terms of size, but captured the high tech look and feel of the Renegades animation very well. It only sat one figure, with the rest of the mass of the toy dedicated to spring loaded or button operated features. Unfortunately, even when you take the thing apart, there isn't a ton of room for crew or cargo conversion anyway, not without a complete overhaul, reworking and rebuilding. I wasn't looking to do all that. I liked the look of the Black Dragon and just wanted to change the feel of it, take away the techy looking lines and give it a more combat oriented role. I settled on a two color, desert splinter theme.


The paint I will be using is Rustoleum Rusty metal primer (chosen for the color, not the type of paint) and Krylon Camo Sand. Using the Krylon Sand is really a treat for me, because up until last year, I couldn't find it anywhere in my area. I ran into a full case at a Wal-Mart, in the clearance aisle, and grabbed every can. Finding a good sand colored paint isn't easy, many customs I have done used Tamiya Desert Sand which gets VERY expensive for larger pieces.

As I mentioned, the Dragon is a complicated mess of spring loaded features on the inside, and once disassembled, has a ton of parts. The first thing I do it split the pieces into two groups, the parts I am painting, seen here, already cleaned, sanded and prepped for painting.


And then the pieces I am not painting, shown here. There are a lot of moving parts on the Dragon, to allow for the tilting rotors, the spring back wings, and the bomb and cannon releases. Also, many of the parts are a tight fit. Even though they are cast in red, a color not traditionally associated with a desert scheme, I decided to leave them unpainted, along with the grey accessories, to make reassembly easier and retain the functionality without gumming up the tightly fit parts with excess paint.


The dominant color will be sand, with a sharp, reddish brown splinter pattern over it. So I start by laying down a coat of brown on all the most visible surfaces, careful not to over apply it in areas with joints or moving parts. This paint is meant to be used as a rusty metal primer, so I am a little unsure of how it will work with plastic. Also, it is a very flat, dry paint, so care must be taken when applying it because it tends to build up in some areas with a coarse, almost dusty texture. Luckily, it went on easily, and I allowed a day for it to dry due to the high temperatures and humidity in my area this time of year.


The next step is to mask off the pattern, the areas that will stay brown after the main color is applied. I use blue painters tape, lay it down on an x-acto cutting board, and cut the individual shapes out one at a time. Like I mentioned, I am shooting for a pointy splinter scheme, it will offset the sleek lines of the dragon body nicely. I have done this many times, so I just cut the shapes out by hand with no reference or ruler, but someone who isn't used to doing this may want to have some photos on hand to keep their shapes similar and somewhat uniform in feel. One problem I frequently run into when I am doing this is that I intentionally start out making the shapes somewhat simple, but they slowly become more complicated as I go along, and I have to step back and look at the piece every few minutes to make sure the scheme is uniform in feel, scale and shape.


After the mask is applied, making sure every piece is as tightly affixed as possible in corners and over detail areas, I like to give the whole thing a light coating of matte finish clear coat to help seal up any areas that might allow the colors to bleed when next coat is applied. After that dries, I apply the Sand color over every piece.


When the top coat is dry, I carefully start removing the mask to reveal the brown color underneath. Normally this is pretty painless and the look of the model really starts to take shape, but sometimes an issue arises. Here, you can see the mask pulled up all the paint on one of the small rear wings.


With some of the modern plastics used in toys, no matter how much they are prepped, cleaned, sanded, or primed, you can still have an occasional adhesion issue. I've had it with every type of paint or primer at one times of another. There are several ways to fix a problem like this once it happens. Personally, I like to avoid brushing paint over sprayed areas just because it will always stick out to me, so I will try to remask it and spray it again as easily and painlessly as possible. Since the painters tape tore up the paint last time, I try something a little weaker-post it notes.


Yes, it looks ridiculous, and yes, they are not water tight, but all they have to do is shield the area I don't want to paint. I mask off the area and decide to go over it with sand instead of trying to rebuild the brown area that came off with the tape. I spray several light coats, and while it is still drying, I peel off the post it notes. If you allow it to dry for too long, it could penetrate the paper and permanently adhere to the piece, which would require serious repair later.


Here is the result. Not perfect, but certainly better, and after some finish work, it will be barely noticeable.

After removing all the masking, I take a high grit sandpaper, 400 or higher, and lightly buff over the entire piece. This removes any small instances of paint build up around the masked areas, so there isn't a noticeable "lip" from one color to the next.


With the mask removed, the full camo scheme is revealed. I decided to give the entire piece a light drybrushing with Tamiya Buff, a sandy color, to give it a light weathering and offset some of the lines and edges of the plane against the camo. I also painted the seat, engines and vents with a metallic gray. Afterwards, all the parts were clear coated with matte finish, and as that dried, I slowly assembled the pieces, reinstalled all the spring loaded weapons, screwed all the joints into place, and did some additional dry brushing to fix any differences in color from part to part after assembly.


The final step was to apply decals, and finish with a light coating of matte finish to dampen the gloss of the decals. The decals were taken from assorted sheets I have collected over the years, from places like Cobrastickers.com, or from retail vehicles, or in the case of the awesome Desert Scorpion Cobra I used for the rear wings, from another awesome customizer named Bryan who goes by the handle "Chickenbroth" on Hisstank. He had a chance to have a few decal sheets made and was kind enough to include me in the deal. I've just been waiting to use them for the right project, and this was it. Thanks Bryan!

Here are the pics of the finished project, the Cobra Sand Dragon, taken today. While this is a modern era GI Joe vehicle and is meant for use with the modern era figures, I threw the scene together some vintage style custom troopers by Black Major, because that is mainly the format that I collect.